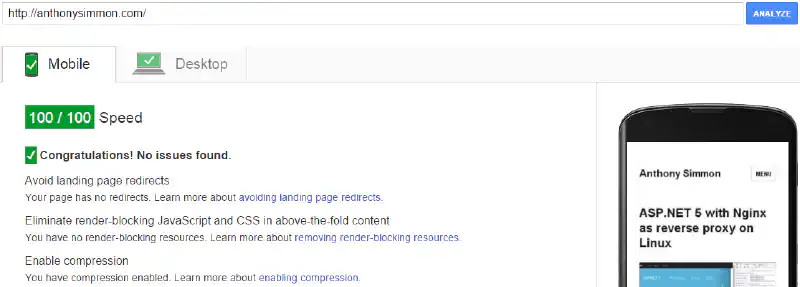
This post was originally published in 2015 and may contain outdated information.
After many adjustments, I finally manage to score 100/100 on Google PageSpeed Insights. If you use WordPress, you will notice that the difficulty will depend on your current theme and installed plugins. In my case, I started with a score of 51 on mobile and 72 on desktop. In this post, I will present a summary of the steps I followed to get the best score on this tool.
Why should you consider getting 100/100 on Google PageSpeed Insights
Google PageSpeed Insights is a tool that measures the global performances of a website on mobile devices and computers. It gives you many advice to increase your website loading time. Here are some leads to get the best performances:
Install W3 Total Cache
W3 Total Cache is a WordPress plugin designed to improve WordPress performances and user experience. A short list of its benefits:
- It creates cached HTML files from dynamic WordPress blog posts and pages.
- JavaScript files and CSS stylesheets can be cached, minified and combined without query strings.
- Database objects can be cached on disk.
- JavaScript files can be loaded asynchronously.
- HTML content can be minified as well as inline JavaScript and CSS.
- It enabled gzip compression and browser cache.
Use a WordPress child theme
Some WordPress themes might not be well optimized, so by using a child theme you will be able to override the assets ordering. If you use W3 Total Cache, you will be able to use its comments tag to specify where the combined and minified JavaScript and CSS will appear.
If you know what you’re doing, you can go a little further. Some plugins loads external assets which are not minified and/or don’t use browser caching. If you dequeue them and enqueue them from your child theme folder, W3 Total Cache (for example) will minify them and apply expires headers on it. Google PageSpeed Insights loves that.
Install Google PageSpeed module for Apache or Nginx
Google PageSpeed module can apply filters on assets and markup that comes out of you Apache of Nginx web server. It will optimize your HTML markup as well as other assets. Even images can be compressed without quality loss (even better than Photoshop’s “Save for Web”).
Use Cloudflare CDN and DNS
CloudFlare provides a content delivery network and DNS services. It’s absolutely free and easy to set up, all you have to do is to change your NS domain’s records. It also provides (non exhaustive list) :
Security: a firewall that prevents DDoS attacks, content scraping and comment spam protection. Optimization: HTML, JS and CSS minification, local storage and browser caching. A free SSL certificate (I’m actually using it as it was mentioned that Google will rank websites which are protected with strong HTTPS encryption better.
Move your assets to the footer
I even moved all the CSS stylesheets to the footer and used a preloader (a fading fullsize layer) so that you won’t see this website without CSS for a few milliseconds. It definitively helped me to get 100/100 at Google PageSpeed Insights as I had warnings saying that my CSS file was blocking the page rendering above the fold. Some will prefer using a third party tool like CriticalCSS to generate the necessary CSS required to render the above the fold part.
