In our last talk about System.CommandLine, we learned how to easily build command line apps using .NET and C#, following most of the advice from CLI guidelines. We also brought in dependency injection to make our code more flexible, easier to read, and simpler to test.
Now that we have our basic setup ready, it’s time to improve our user experience. So far, users have been interacting with our app by typing every single argument each time they invoke the app. In this next part of my System.CommandLine journey, we’re going to make our CLI apps beautiful but also interactive, thanks to the Spectre.Console .NET library.
Spectre.Console helps build beautiful interactive console applications
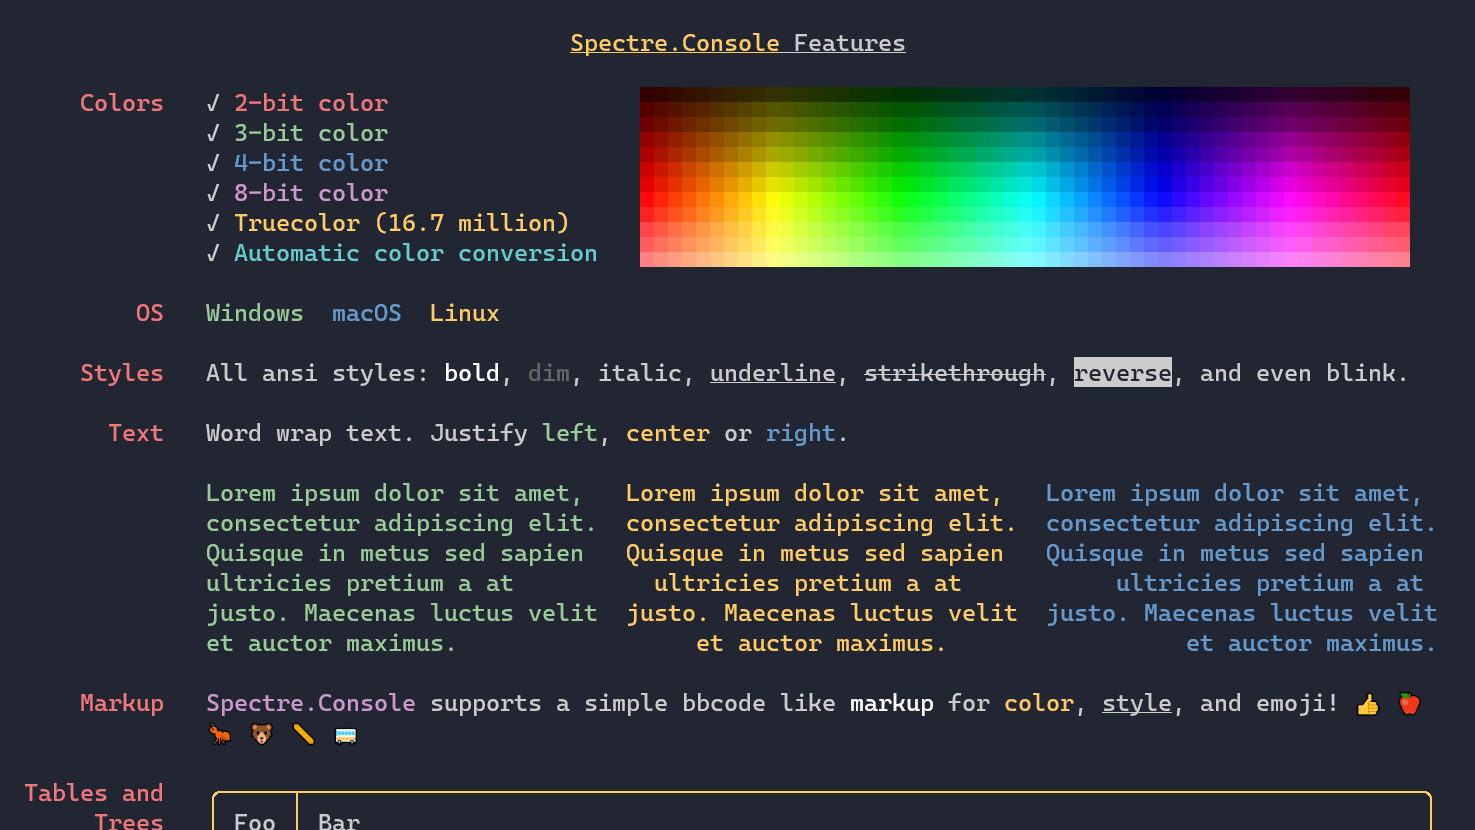
Spectre.Console is a popular open-source .NET library, backed by the .NET Foundation, with over 7k GitHub stars ⭐. The key features are:
- Improved prompts and interactivity: Say goodbye to
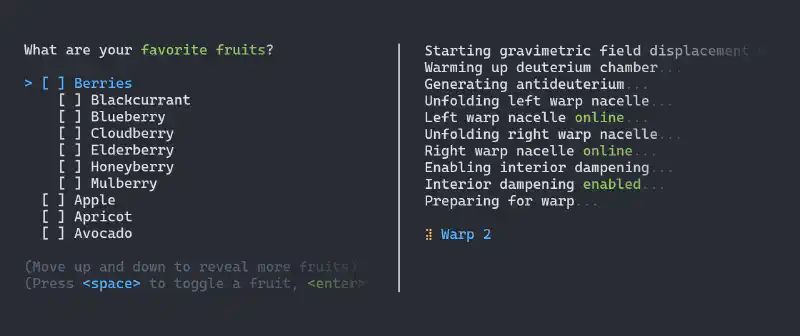
Console.ReadLineandConsole.WriteLine. We can now leverage complex prompts like interactive single item selection, multiple choice selection, secret prompt, prompts with validation, and much more. - Advanced rendering capabilities: Spectre.Console offers 24-bit colors, text styling (like bold, italic, etc.), a variety of widgets (like tables, trees, and even ASCII images), progress display for long-running tasks, status controls, and much more.
- Terminal compatibility: Not all terminals can handle these advanced features. But don’t worry, Spectre.Console smartly detects the terminal’s capabilities to adjust the rendered output.

Integrating Spectre.Console into a System.CommandLine console application
Start by installing the Spectre.Console NuGet package. Going forward, we’ll be using the IAnsiConsole interface, so let’s put aside the static System.Console class and the IConsole abstraction from System.CommandLine. Next, we’ll inject the default IAnsiConsole implementation into our dependency injection services. If you’re not familiar with the UseDependencyInjection(...) method, you can grab the code from my previous blog post.
// [...]
var builder = new CommandLineBuilder(rootCommand);

builder.UseDefaults();
builder.UseDependencyInjection(services =>
{
    services.AddSingleton(AnsiConsole.Console); // <-- HERE!
});

return builder.Build().Invoke(args);
Crafting a beautiful, interactive command
For demonstration purposes, let’s build a command designed to create a .NET project. The user will be asked to select the project type, and then we’ll display the selected type and no-op the actual project creation process (since that’s not our focus here). We will use the SelectionPrompt<string> class to present the available project types, letting the user navigate using the up and down arrow keys.We will also add some colors to emphasize parts of our console output.
Here’s what the code looks like:
using System.CommandLine;
using Spectre.Console;

// Command<,> comes from a previous post https://anthonysimmon.com/true-dependency-injection-with-system-commandline/
public class CreateProjectCommand : Command<CreateProjectCommandOptions, CreateProjectCommandOptionsHandler>
{
    public CreateProjectCommand()
        : base("create-project", "Create a .NET project")
    {
    }
}

public class CreateProjectCommandOptions : ICommandOptions
{
}

public class CreateProjectCommandOptionsHandler : ICommandOptionsHandler<CreateProjectCommandOptions>
{
    private readonly IAnsiConsole _console;
    private readonly IProjectManager _projectManager;

    public CreateProjectCommandOptionsHandler(IAnsiConsole console, IProjectManager projectManager)
    {
        this._console = console;
        this._projectManager = projectManager;
    }

    public async Task<int> HandleAsync(CreateProjectCommandOptions options, CancellationToken cancellationToken)
    {
        var prompt = new SelectionPrompt<string>()
            .Title("What [green]type of project[/] would you like to create?")
            .AddChoices(this._projectManager.ProjectTypes);

        var projectType = await prompt.ShowAsync(this._console, cancellationToken);
        this._console.MarkupLineInterpolated($"You selected [green]{projectType}[/].");

        await this._projectManager.CreateProjectAsync(projectType, cancellationToken);

        return 0;
    }
}

// Also add "services.AddSingleton<IProjectManager, NoopProjectManager>()" in the dependency injection setup
public interface IProjectManager
{
    string[] ProjectTypes { get; }

    Task CreateProjectAsync(string projectType, CancellationToken cancellationToken);
}

public sealed class NoopProjectManager : IProjectManager
{
    // For demonstrations purposes only
    public string[] ProjectTypes => new[]
    {
        "ASP.NET Core Web API",
        "ASP.NET Core Web App",
        "Class Library",
        "WPF Application",
    };

    public Task CreateProjectAsync(string projectType, CancellationToken cancellationToken)
    {
        return Task.CompletedTask;
    }
}
Have you noticed how we support user cancellation (Ctrl+C) with the CancellationToken provided by System.CommandLine? This feature is incredibly useful. You can catch an OperationCanceledException, display a exit message to the output, clean up some resources, and more. Always try to honor a user cancellation request when possible.
Unit testing interactive commands
Because we use the IAnsiConsole abstraction instead of the AnsiConsole static class, we have the possibility to unit test our command handler. This is facilitated by the additional Spectre.Console.Testing NuGet package. It provides a TestConsole implementation where we can preset input keys. In the unit test below, we ensure that given a mocked list of project types, pressing the down arrow key twice, followed by the enter key, selects the third project type. This selection is then passed to the IProjectManager.CreateProjectAsync dependency method.
using FakeItEasy;
using Spectre.Console.Testing;
using Xunit;

namespace HelloCommandLine.Tests;

public class CreateProjectCommandTests
{
    [Fact]
    public async Task Test1()
    {
        // I use FakeItEasy to mock the project manager: https://fakeiteasy.github.io/
        var projectManager = A.Fake<IProjectManager>();
        A.CallTo(() => projectManager.ProjectTypes).Returns(new[] { "a", "b", "c", "d" });

        var console = new TestConsole();
        console.Profile.Capabilities.Interactive = true;
        console.Input.PushKey(ConsoleKey.DownArrow);
        console.Input.PushKey(ConsoleKey.DownArrow);
        console.Input.PushKey(ConsoleKey.Enter);

        var handler = new CreateProjectCommandOptionsHandler(console, projectManager);

        var result = await handler.HandleAsync(new CreateProjectCommandOptions(), CancellationToken.None);

        Assert.Equal(0, result);

        A.CallTo(() => projectManager.CreateProjectAsync("c", CancellationToken.None))
            .MustHaveHappenedOnceExactly();
    }
}
Enabling all colors, emojis and animated spinners
To get access to the full range of colors, emojis, and animated spinners in Spectre.Console, we need to change the Console input and output encoding to UTF-8. This isn’t enabled by default, but it’s easy to do:
Console.InputEncoding = System.Text.Encoding.UTF8;
Console.OutputEncoding = System.Text.Encoding.UTF8;
You might also want to consider applying this change only when the console input and output are not redirected.
Wrapping up
Building user-friendly, attractive CLI applications in .NET is much simpler with the combined powers of System.CommandLine and Spectre.Console. From better prompts and interactivity to enhanced rendering capabilities, these libraries allow developers to create robust, engaging CLI experiences.
Have you tried using these libraries before? I’m curious about your experiences!
